
DIY Calligraphy: A Simple Introduction to a Beautiful Art
Discover the elegant world of DIY calligraphy, a timeless art form that’s accessible to everyone. Whether you’re looking to add a personal touch to invitations, create stunning wall art, or simply enjoy a relaxing hobby, learning calligraphy at home is simpler than you think. This beginner-friendly guide will walk you through everything from essential tools to basic techniques, helping you unlock the beauty of hand-lettering. With practice, your DIY calligraphy projects can rival professional designs, boosting your creativity and confidence.
What is Calligraphy and Why Try DIY?
Feature Video
Calligraphy, derived from the Greek words for “beautiful writing,” is the art of producing decorative handwriting using a brush or pen. Unlike standard printing or cursive, calligraphy emphasizes rhythm, proportion, and flow, creating visually striking letters. In the DIY era, calligraphy for beginners has surged in popularity thanks to social media platforms like Instagram and Pinterest, where enthusiasts share stunning brush lettering and modern scripts.
Why choose DIY calligraphy? It’s therapeutic, affordable, and endlessly customizable. No art degree required—just patience and practice. Studies show handwriting boosts brain function, reduces stress, and enhances mindfulness. Perfect for weddings, journaling, or home decor, DIY calligraphy lets you personalize gifts and planners uniquely. Start today, and transform ordinary words into extraordinary art.
Essential Tools and Materials for Beginner Calligraphy

Gathering the right supplies is the first step in your calligraphy journey. You don’t need expensive equipment; many items are available at craft stores or online for under $50.
1. Calligraphy Pens: Begin with a brush pen like the Tombow Dual Brush Pen or Pentel Fude Touch. These flexible nibs mimic traditional brushes, ideal for modern calligraphy. For pointed pen styles, try a Nikko G nib with an oblique holder.
2. Ink and Paper: Use sumi ink or fountain pen ink for dip pens. Opt for smooth, non-bleed paper like Rhodia dot pads or HP Premium Choice Laserjet. Practice sheets with guidelines (free downloads online) prevent uneven letters.
3. Other Essentials: A lightbox for tracing, pencil for sketching, eraser, ruler, and water cup for cleaning. Pro tip: Invest in a pen rest to avoid ink blobs.
With these basics, you’re set for DIY calligraphy tutorials. Total beginner kit cost: $20-40. Reuse and refill to keep it budget-friendly.
Mastering the Basic Strokes in DIY Calligraphy
The foundation of beautiful calligraphy lies in eight fundamental strokes. Practice these daily for 15 minutes to build muscle memory. Hold your pen at a 45-55 degree angle, relaxing your grip.
Downstroke (Thick Line): Apply pressure as you pull downward. Start thin, swell in the middle, release to thin—creating drama.
Upstroke (Thin Line): Light touch, push upward without pressure for elegant hairlines.
Other strokes: entry/exit, curve, loop, oval, compound curve, and underturn. Use dotted worksheets to trace. Video tutorials on YouTube (search “beginner calligraphy strokes“) accelerate learning. Consistency is key—aim for 100 repetitions per stroke.
Once comfortable, combine into letters. Start with lowercase ‘o’ and ‘l’ to understand bounce and spacing.
Popular Calligraphy Styles for Beginners

Dive into styles suited for DIY calligraphy:
Modern Brush Lettering: Bouncy, playful—perfect for quotes and signs. Uses brush pens.
Faux Calligraphy: Easiest entry. Write print letters, thicken downstrokes with a marker. No special tools needed.
Copperplate Script: Elegant, italic-style with pointed pens. Ideal for formal invites.
Blackletter/Gothic: Bold, medieval look for posters.
Experiment via free printable alphabets. Modern style is most forgiving for newbies, forgiving inconsistencies with its organic flow.
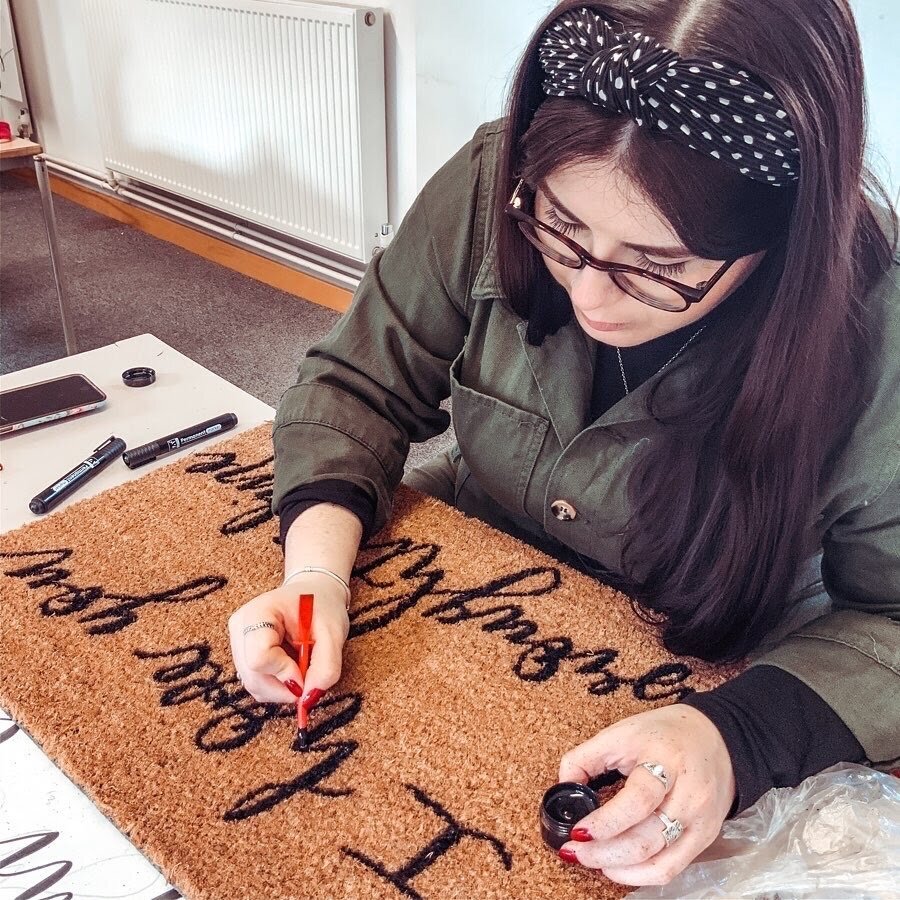
Step-by-Step Guide to Your First Calligraphy Project

Ready for hands-on? Create a motivational quote wall art.
Step 1: Choose words like “Dream Big.” Sketch lightly in pencil on guideline paper.
Step 2: Ink basic strokes over pencil lines, starting left to right.
Step 3: Erase guidelines once dry. Add flourishes for flair.
Step 4: Scan and print, or frame directly. Use metallic pens for shimmer.
This project takes 30 minutes. Progress to envelopes: Practice addresses on junk mail.
Practice Tips to Elevate Your DIY Calligraphy
Consistency trumps talent. Dedicate 20 minutes daily. Warm up with drills, then freehand words.
Record progress in a journal. Join communities like r/Calligraphy on Reddit or Instagram challenges (#30DaysofCalligraphy).
Improve speed and control: Use slower music, focus on breath. Analyze pros—copy favorites ethically.
Tools evolve: Upgrade to lightfast inks for framed art. Experiment with watercolors under letters for ombre effects.
Fun DIY Calligraphy Projects for Beginners
Apply skills creatively:
Wedding Invitations: Design suites with Canva templates, hand-letter headers.
Planner Stickers: Letter habit trackers, cut with Cricut.
Custom Mugs: Use oil-based markers (bake to set).
Holiday Cards: Batch-produce signatures.
Wood Signs: Paint base, add vinyl stencils, letter freehand.
These projects monetize via Etsy—sell printables or commissions.
Common Mistakes and How to Avoid Them

Avoid pitfalls:
Inconsistent Pressure: Practice stroke isolation.
Poor Spacing: Use “x-height” (height of lowercase x) as unit.
Smudges: Let dry fully; work left-to-right if right-handed.
Grip Tension: Relax shoulders; pen between thumb/index, rest on middle finger.
Frustration? Take breaks. Progress is non-linear.
Advanced Tips and Resources for Aspiring Calligraphers
Level up with classes on Skillshare (“Pointed Brush Pen Calligraphy”) or books like “Modern Calligraphy Bible.” Apps like Calligrapher track strokes.
SEO bonus: Share your DIY calligraphy on Pinterest with keywords for traffic.
Sustainable twist: Use eco-inks, recycled paper.
Conclusion: Start Your Calligraphy Adventure Today
DIY calligraphy is more than writing—it’s self-expression. From basic strokes to stunning pieces, this art rewards dedication. Grab supplies, practice patiently, and watch your skills bloom. Whether for personal joy or gifting, calligraphy for beginners opens creative doors. Share your first piece online—what will you letter? Dive in; beauty awaits your hand.
(Word count: 1,248)